If you’re only using ActiveCampaign for email marketing, you’re leaving one of its most valuable features untouched: the ActiveCampaign Sales Pipeline. Most users build automations, send campaigns, and then track their actual sales opportunities in a spreadsheet on the side — which completely defeats the purpose of having an all-in-one platform.
In this guide, you’ll learn exactly how to set up a fully automated ActiveCampaign Sales Pipeline from the ground up, including how ActiveCampaign’s AI automation builder, Active Intelligence, can build your follow-up sequences in seconds instead of the twenty minutes it used to take.
What You Need Before Setting Up Your ActiveCampaign Sales Pipeline
Before you start, it’s worth knowing that the Deals CRM isn’t included on every plan by default. If you’re on the Starter plan, you won’t see the Deals section in your sidebar at all.
To build the ActiveCampaign Sales Pipeline covered in this guide, you need:
- The Plus plan or higher
- The Pipelines Enhanced CRM add-on active on your account (this unlocks the sales pipeline, deal automations, and sales reports)
If you also want AI-powered win probability scoring and sentiment analysis on your deals, that requires the Sales Engagement add-on, which sits a tier above Pipelines Enhanced. If Deals is already visible in your sidebar, you’re ready to go.
Step 1: Create Your ActiveCampaign Sales Pipeline
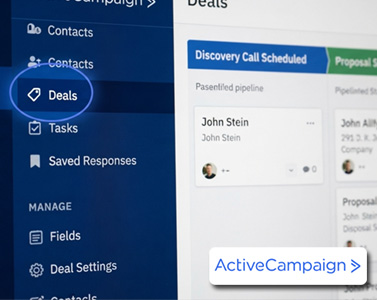
Click Deals in the left sidebar to open your sales CRM. You’ll land on the pipeline view — a Kanban board where each column represents a stage in your sales process. By default, ActiveCampaign creates three placeholder stages: To Contact, In Contact, and Follow Up. These are generic and don’t reflect your actual sales process yet.
To build your own pipeline, click the pipeline dropdown at the top left and select Add a pipeline. In the setup modal, name your pipeline something that reflects your process (for example, “New Client Acquisition”) and set your default currency.
Two settings here are easy to overlook but important:
- Group Access – controls which teams can see and work inside this pipeline, which matters if you run separate sales teams for different products or regions.
- Assignment Method – determines how new deals get distributed. Round Robin spreads deals evenly across your team, while Round Robin Deal Value routes larger deals to your most experienced reps automatically.
Choose the method that fits your team, select the reps in the group, and click Add.
Step 2: Customize Your Pipeline Stages
Once your pipeline is live, it’s time to replace the default stages with ones that reflect a real sales cycle. Click the gear icon on any stage and choose Edit Stage. From here you can rename the stage, assign a header color for at-a-glance visual tracking, adjust card width, and control how deals are sorted within that column.
A solid example for a B2B sales cycle is a six-stage structure: Lead Captured, Discovery Call Scheduled, Proposal Sent, Negotiation, Closed Won, and Closed Lost. Color-coding each stage makes the health of your pipeline readable in seconds. This is worth spending real time on, since every automation you build afterward depends on these stages being accurate.
Step 3: Add Custom Deal Fields to Make Your CRM Smarter
Before creating deals, go to Fields > Deals to add business-specific data to every deal record. Three fields make the entire system noticeably smarter:
- Lead Source (dropdown): Organic Search, Referral, Paid Ads, LinkedIn, Webinar
- Deal Priority (dropdown): High, Medium, Low
- Next Follow-up Date (date field): especially powerful since date fields can trigger automations on a specific day
These fields appear on every deal record and can be used as conditions and triggers inside your automations — which is what turns them from simple labels into real functionality.
Step 4: Create and Understand a Deal Record
Click New Deal to see what a deal record actually looks like before automating anything. Add a title (contact name plus what they need, like “Website Redesign” works well), select the pipeline and stage, link it to a contact, set the deal value, and assign an owner.
Once created, opening the deal card shows you the full record layout. The left side holds everything actionable — deal details, internal notes, and one-to-one emails sent directly from the deal. The right side shows open tasks and a full activity feed, a chronological log of everything that’s happened on the deal, including which automations ran. This becomes essential when troubleshooting or handing a deal to another rep.
Step 5: Automate Your ActiveCampaign Sales Pipeline With Active Intelligence
This is where your ActiveCampaign Sales Pipeline turns into a real machine. Inside Automations, you’ll see Active Intelligence — ActiveCampaign’s AI automation builder. You describe what you want in plain language, and it generates the workflow structure for you.
For a manual build, set the trigger to Submits a Form, select your lead form, and set it to run once per contact to prevent duplicate deals. Then add your first action:
- On CRM, click Add a deal, select your pipeline, and set the stage to Lead Captured.
- For the deal title, use a personalization tag like FIRSTNAME – New Lead so each deal is automatically named.
- Set the owner to Round Robin to distribute leads across your team.
- Add a notification email so your team is alerted instantly.
- Add a deal task — a timestamped to-do tied directly to the deal record.
Name the automation and activate it. From that point forward, every form submission creates a deal, notifies your team, and puts a follow-up task on the right rep’s radar — completely hands-off.
For a second automation, try the Active Intelligence AI prompt directly. Type out what you want in plain language, and it will generate a structure — a deal stage trigger, an email action, a wait period, and a conditional branch — for you to review and fill in with your own templates. What used to take twenty minutes of manual building now takes under two.
Step 6: Track Performance With Deals Reports
Once your pipeline and automations are running, go to Reports > Deals to see the payoff. With the Pipelines Enhanced CRM add-on active, you get a deal forecast chart showing expected revenue based on deals currently active in your pipeline, plus a breakdown of deals by stage — so you always know where your pipeline is loaded and where it’s running thin.
Frequently Asked Questions About the ActiveCampaign Sales Pipeline
Does ActiveCampaign have a built-in CRM? Yes. It’s called Deals, and it gives you a Kanban-style sales pipeline alongside your existing email and automation tools.
What plan do I need to use the ActiveCampaign Sales Pipeline? You need the Plus plan or higher, along with the Pipelines Enhanced CRM add-on. AI scoring and sentiment analysis require the Sales Engagement add-on.
Can I fully automate deal creation in ActiveCampaign? Yes. You can trigger deal creation from form submissions, automatically assign owners, send notifications, and create follow-up tasks without any manual steps.
What is Active Intelligence in ActiveCampaign? It’s ActiveCampaign’s AI automation builder, which turns a plain-language description into a working automation structure, including triggers, actions, waits, and conditional branches.
Final Thoughts
A properly built ActiveCampaign Sales Pipeline turns scattered spreadsheets and guesswork into a system that captures leads, assigns them, follows up, and reports on results automatically. Once the structure and automations are in place, the platform does the manual work your team used to handle by hand — and Active Intelligence makes building that structure faster than ever.
If you found this guide useful, the full step-by-step walkthrough is available on The Automation Mentor YouTube channel.