
Between fifty and eighty percent of shoppers who add something to a cart in your WooCommerce store leave without completing their purchase. That is not a minor leak — that is the majority of your potential revenue walking out the door. The good news? A properly built ActiveCampaign abandoned cart WooCommerce automation can win back ten to thirty percent of those lost sales, running completely on autopilot.
But here is the problem: most WooCommerce store owners set up the automation, turn it on, and wait. And wait. And nothing ever sends.
This guide walks you through the exact setup — including the critical step that nearly every tutorial skips — so your abandoned cart flow actually fires the way it is supposed to.
The Real Reason Your ActiveCampaign Abandoned Cart WooCommerce Flow Never Sends
Before building anything, you need to understand why so many people run into the same wall.
Inside ActiveCampaign’s automation builder, the Abandons Cart trigger lives in the E-commerce tab and looks completely ready to use right out of the box. So people confidently build the entire automation, set it to Active, and then — silence. Not a single email sends.
The reason is straightforward: the trigger has an Integration dropdown, and without the WooCommerce Deep Data integration properly connected, there is no store to select in that dropdown. Without a store selected, nothing is feeding the trigger real cart events, and it will silently never fire.
A basic connection through Zapier or Make.com is not enough. Deep Data is the specific integration type that streams your store’s live order and cart data directly into ActiveCampaign in real time. Without it, the trigger has nothing to listen to.
The correct order is always: connect Deep Data first, then build the automation.
Step 1: Connect Deep Data Inside ActiveCampaign
The Deep Data connection has two halves. The first lives inside ActiveCampaign.
Go to Settings (top right) → Integrations → Add an Integration → choose WooCommerce. You will be prompted to enter the full URL of your WooCommerce store. Paste it in and click Connect.
ActiveCampaign will redirect you to your WooCommerce store to authorize the connection, just like any standard OAuth flow. Once you approve it, you will land back in ActiveCampaign with your store listed as connected.
But this is only half of the handshake — and skipping the second half is where cart data silently disappears for a lot of store owners.
Step 2: Install the ActiveCampaign for WooCommerce Plugin
The second half of the Deep Data connection lives inside WordPress.
In your WordPress admin, go to Plugins → Add Plugin and search for ActiveCampaign for WooCommerce. This is the official plugin that creates the communication bridge between your store and your ActiveCampaign account. Click Install Now, then Activate.
Once the plugin is active, open its settings and click Manually Configure the API. This is where you paste your ActiveCampaign API URL and API Key — both found inside ActiveCampaign under Settings → Developer. Copy them over, paste them into the two fields, and click Update Settings.
That completes the Deep Data connection. ActiveCampaign now knows about your store, and the plugin on the store knows how to talk back to ActiveCampaign. This two-way link is what fills in that empty Integration dropdown on the trigger — so the ActiveCampaign abandoned cart WooCommerce trigger finally has a store to listen to.
Two Plugin Settings That Matter More Than They Look
Before leaving the plugin, click the Store Settings tab. There are two options worth configuring right away.
Abandoned Cart Wait Time: This tells ActiveCampaign how long to wait after someone abandons a cart before the automation fires. If you are coming from a Shopify background, this is an important difference — for WooCommerce, this setting lives here inside the WordPress plugin, not inside ActiveCampaign. The default is one hour, which is a solid starting point for most stores.
Opt-in Checkbox: This is the consent checkbox shoppers see at checkout. You control the wording, its visibility, and whether it is pre-checked. Only shoppers who opt in will be synced for marketing, keeping you compliant with privacy regulations. Set both options to your preference and click Update Settings.
Step 3: Configure the ActiveCampaign Abandoned Cart WooCommerce Trigger
With Deep Data connected, head back to ActiveCampaign and go to Automations → Start from Scratch → Continue. Click Add a Start Trigger, open the E-commerce tab, and select Abandons Cart.
This time when you open the Integration dropdown, your WooCommerce store is listed. Select it.
Now configure the three conditions — a contact must match all three to enter the automation:
- Select Product: Leave it on Any Product, or narrow it to a specific product using Product Name Contains or Product Name Matches. This is exactly how you build a dedicated recovery flow for a single flagship product.
- Select Category: Works the same way for an entire product category. Leave on Any for a broad flow.
- Cart Value: This is the powerful one. You can target carts where the value is more than, less than, or equals a specific number. Setting value is more than 100, for example, lets you treat high-value carts completely differently — because a shopper about to spend $200 deserves a very different message than someone with a $10 item in their cart. Just enter the number; no currency symbol needed.
Set whether the trigger should fire once or multiple times per contact, then click Save.
Step 4: Split First-Time Abandoners from Returning Customers
This is what separates a basic abandoned cart email from an advanced, high-converting recovery flow.
Not every abandoner is the same person. Someone who has never bought from you needs social proof and reassurance. A returning customer needs a warmer tone — and maybe a loyalty perk instead of a generic coupon. Sending everyone the same email is a missed opportunity.
Under the trigger, click the + node, go to Workflow, and choose If/Else. Set the condition to: Number of Orders is Greater Than Zero, using the e-commerce data Deep Data is now feeding into your account. Click Save.
Your automation now splits into two paths:
- Yes branch: Returning customers who have bought before and abandoned again.
- No branch: First-time abandoners who have never completed a purchase.
One important step before this works correctly: for order counts to be accurate on existing customers, you need to run the Historical Sync from the WooCommerce plugin at least once, so that past orders are actually inside ActiveCampaign. Find it under Historical Sync in the plugin and click Start Historical Sync. Once that runs, the If/Else condition will route everyone correctly from day one.
Step 5: Build the Dynamic Abandoned Cart Email
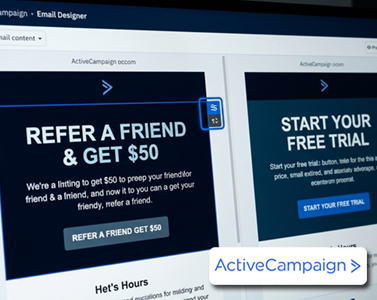
On each branch, click the + node, go to Sending, and choose Send an Email. Create a new email, pick a template, and open the email designer.
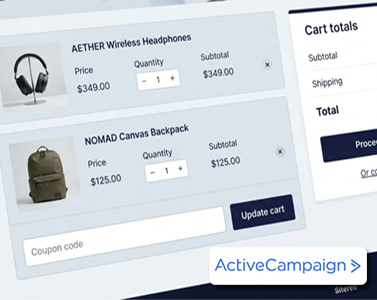
From the content blocks panel, drag the Abandoned Cart block into your layout. This block is the entire payoff of the setup — it automatically pulls in the exact products that specific contact left behind: the product image, name, price, and a Return to Checkout button that takes them straight back to their filled cart. You write none of this manually. It is completely dynamic, unique per contact.
When the Abandoned Cart Builder modal opens, use the Customize tab to show or hide the product image, name, price, quantity, and checkout button. You can also reorder those fields and set whether you want to display all abandoned products or cap the number shown.
Build a tailored email on each branch:
- No branch (new visitors): Lead with trust signals, testimonials, and a clear guarantee.
- Yes branch (returning customers): Use a warmer, familiar tone — and consider a loyalty reward or exclusive perk instead of a generic discount.
Go Live and Track Your Revenue Recovery
When both branches are complete, flip the automation from Inactive to Active in the top corner. Nothing sends until you do this step.
To confirm everything is working and measure the results over time, go to Reports → E-commerce Dashboard. This shows you the revenue your automations are recovering, so you can watch this flow earning its keep from day one.
The Complete ActiveCampaign Abandoned Cart WooCommerce Build at a Glance
Here is a quick summary of what you have set up:
- ✅ Deep Data connected on both sides — inside ActiveCampaign and via the WordPress plugin
- ✅ Abandoned Cart trigger configured by cart value, product, and category
- ✅ First-time vs. returning customer split for fully tailored messaging
- ✅ Dynamic cart email that automatically reconstructs each shopper’s exact abandoned cart
Done right, this automation runs silently in the background and turns one of the biggest revenue leaks in e-commerce into a consistent, automated recovery engine for your store.
Watch the Full Video Tutorial
Want to see every step executed live? Watch the complete walkthrough on The Automation Mentor YouTube channel, where I build the entire flow from scratch — including every plugin setting and trigger configuration shown above. If you have a question about your specific setup, drop it in the comments and I will answer it there. And if this was helpful, subscribe so you do not miss the next tutorial.

Leave a Reply