If you’ve ever built five near-identical email campaigns just to say something slightly different to different segments of your list, ActiveCampaign Conditional Content is the feature that makes that whole workflow unnecessary. It lets one email show a different message to different people — same send, same campaign, two (or more) completely different experiences depending on who opens it. In this guide, you’ll learn exactly how it works, how to build your first conditional block, and the handful of mistakes that trip up almost everyone the first time they try it.
What Is ActiveCampaign Conditional Content?
Conditional content lets you show or hide a block inside an email based on information you already have about a contact — their tags, custom fields, list subscriptions, deal data, or even what they’ve purchased if you sell through a connected store.
It’s easy to confuse this with basic personalization, like inserting a contact’s first name into a subject line. But that only swaps a small value. ActiveCampaign Conditional Content swaps an entire block — an image, a paragraph, a button, or a full section — based on rules you define.
One important note before you start: at the time of writing, this feature is available on ActiveCampaign’s Pro and Enterprise plans. Always confirm current plan availability, since features change over time.
How ActiveCampaign Conditional Content Works
Instead of building one generic email for your whole list, you build a single email with two or more versions of the same section. ActiveCampaign decides which version each person sees the moment the email is generated for them — no manual segmentation, no duplicate campaigns.
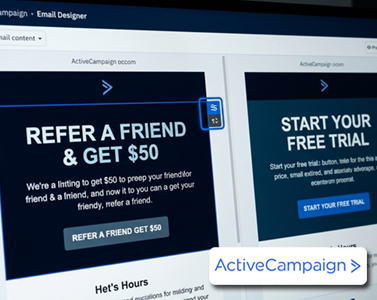
A simple example: you might want existing customers to see a “refer a friend” message, while everyone else sees a “start your free trial” message. Both live inside the same email. The rule you attach to each block decides who actually sees it.
Step-by-Step: Building Your First Conditional Block
- Start your campaign. Click Create a Campaign, choose Standard, pick your list, and open the Email Designer — this is where every conditional block gets built.
- Select the block. Hover over the block you want to condition until a sidebar appears with three dots. Hovering over those dots reveals a row of icons, including one shaped like an upside-down fork — that’s the Conditional Content icon.
- Define the rule. Clicking it opens the segment builder in a floating window. Choose a condition type — tag, custom field, deal field, or ecommerce data — and set your rule. For example, “contact has the tag Customer.”
- Stack rules if needed. You can add multiple rules and choose whether a contact must match all of them or just one.
- Save. A small icon appears in the top-right corner of the block, confirming a condition is active.
Repeat the process for any additional blocks, using the mirror-opposite condition where appropriate — for instance, “does not have the tag Customer” — so every contact sees exactly one version, never both, never neither.
To edit or remove a rule later, hover over that same icon and click it. You’ll see a pencil (reopens the segment builder) and a trash can (removes the condition entirely, after confirmation). Once removed, the block reverts to showing for everyone.
How to Test ActiveCampaign Conditional Content Before You Send
This is the step most people skip — and it’s usually the reason conditional content “seems broken” when it’s actually just doing exactly what the rule says.
Go to the Summary step of your campaign and click Desktop Preview. In the upper-right corner, you’ll find an email field. Type in a contact you know has the relevant tag and click Preview — the email reloads showing exactly what that person would see. Clear the field, enter a contact without that tag, and preview again. If the two versions don’t look right at this point, the condition is the first thing to check, not the design.
Common ActiveCampaign Conditional Content Mistakes (and How to Avoid Them)
1. Typos in tags or field values. ActiveCampaign matches tags and field values exactly. If conditional content isn’t showing for anyone, go to Contacts, search for the exact tag, and confirm real contacts actually have it before assuming the feature is broken.
2. Conditioning on lists instead of tags. If a contact is subscribed to more than one list, conditional content only looks at the very first list they were ever added to. Tags don’t have that limitation, which is exactly why ActiveCampaign recommends using tags for this feature.
3. Special characters that break the logic. Curly quotes, curly apostrophes, curly brackets, and the percent sign are known to cause problems. Stick to plain, straight quotes inside any text you’re making conditional.
4. Overloading a single email. There’s no hard cap on how many conditional blocks you can add, but keeping each email to a handful of clearly-named conditions will save you a headache later when you need to edit it.
If you’re still using the Classic Designer, the same feature exists there too — look for a gear icon labeled “Make Conditional.”
Frequently Asked Questions
Is ActiveCampaign Conditional Content available on every plan? No. At the time of writing, it’s limited to Pro and Enterprise plans. Check your current plan for availability, as this can change.
Can I use deal or ecommerce data as a condition? Yes. Ecommerce fields, deal fields, and geolocation are all available in the same segment builder, alongside tags and custom fields.
Why isn’t my conditional block showing for anyone? The most common cause is an exact-match issue — a small typo in a tag name or field value. Double-check spelling in both the condition and the contact record.
Final Thoughts
Once ActiveCampaign Conditional Content clicks, you stop building five versions of the same campaign and start building one email that adapts to everyone on your list automatically. The workflow is simple: click the conditional content icon on a block, define who should see it, save, and always confirm with Desktop Preview before you send. Get those four steps right, and this becomes one of the most efficient tools in your ActiveCampaign toolkit.